Prepare the following to start a class:
- a wifi network for the class
- tablet wifi “on”
- have the teacher and students connect to the same wifi network
Starting a class
1. The teacher can start a class from My Class or Class Schedule. Students select Join class.
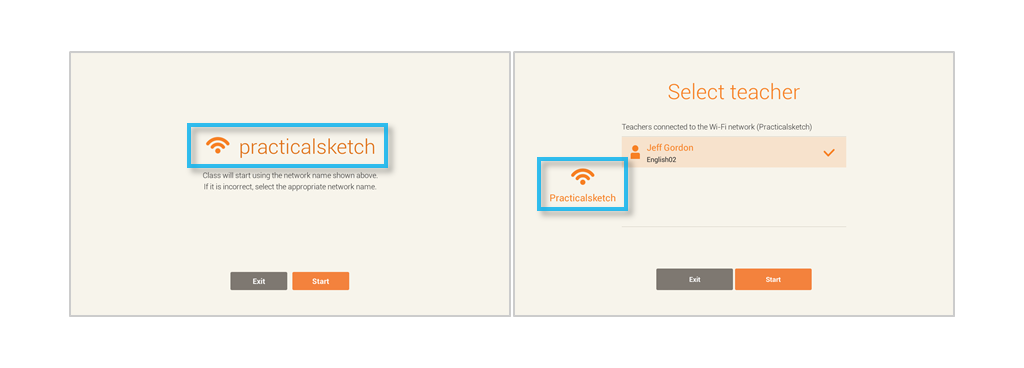
2. Verify that the teacher and students are on the same wifi network.
3. Students select the teacher, and then press the start button.
Teacher and Student Tablet
4. Students choose their profile and then select the next button.
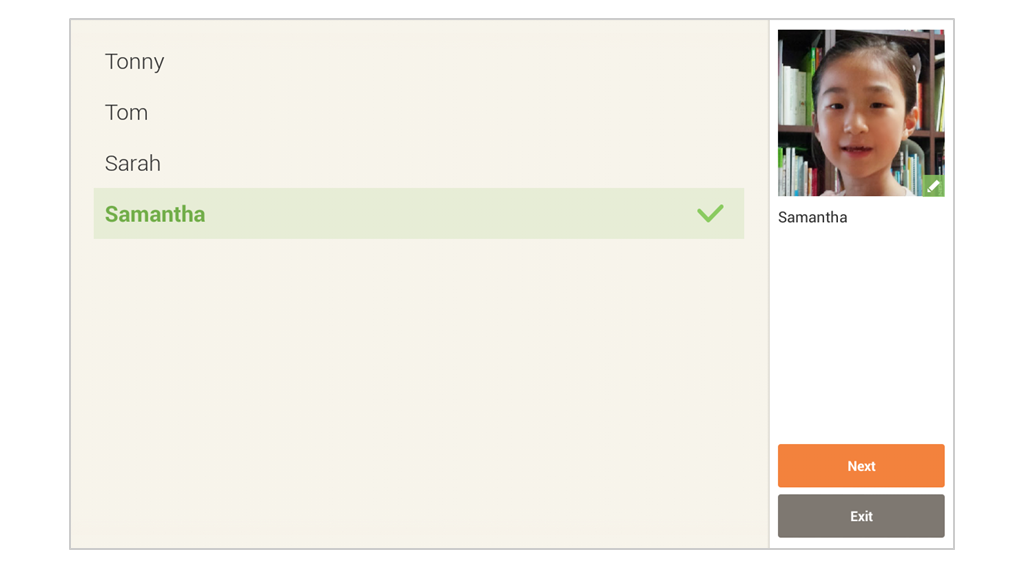
Student Profile Settings
5. Students then enter the PIN number displayed on the teacher’s tablet in order to join the class. Student attendance is shown on the teacher’s tablet. When the students have joined the class, the teacher selects the “Start Session” button to begin class.
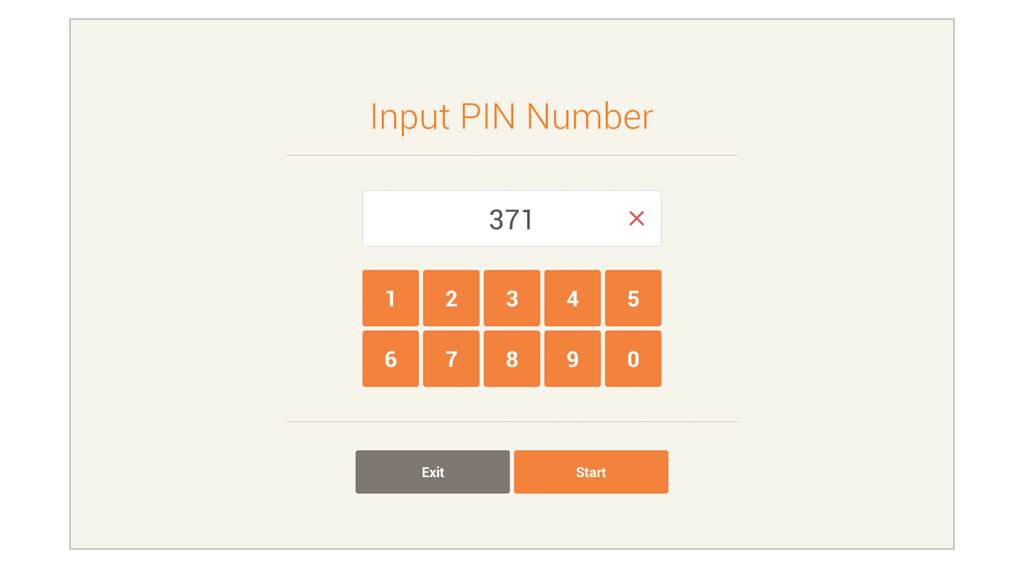
Input the Student PIN number
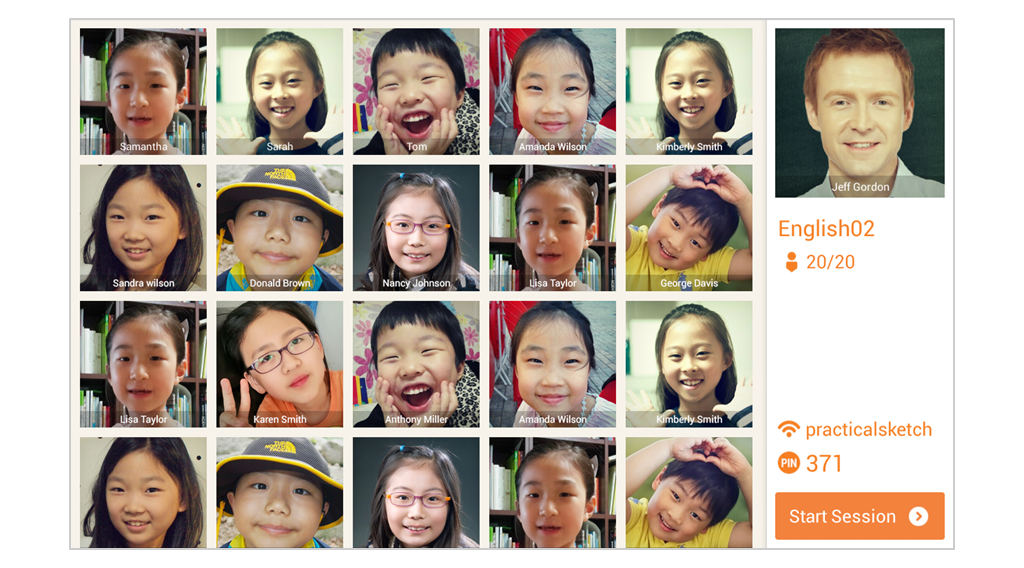
Confirm student attendance
Important: the teacher and students must be connected to the same wifi network and have the same PIN number. The PIN number changes at the beginning of each class, so check to see that the correct PIN number has been entered.
6. Select the Material Slide from the Class Material. The students automatically download the selected slide. Once the transfer is complete, the slide opens and the class can begin.
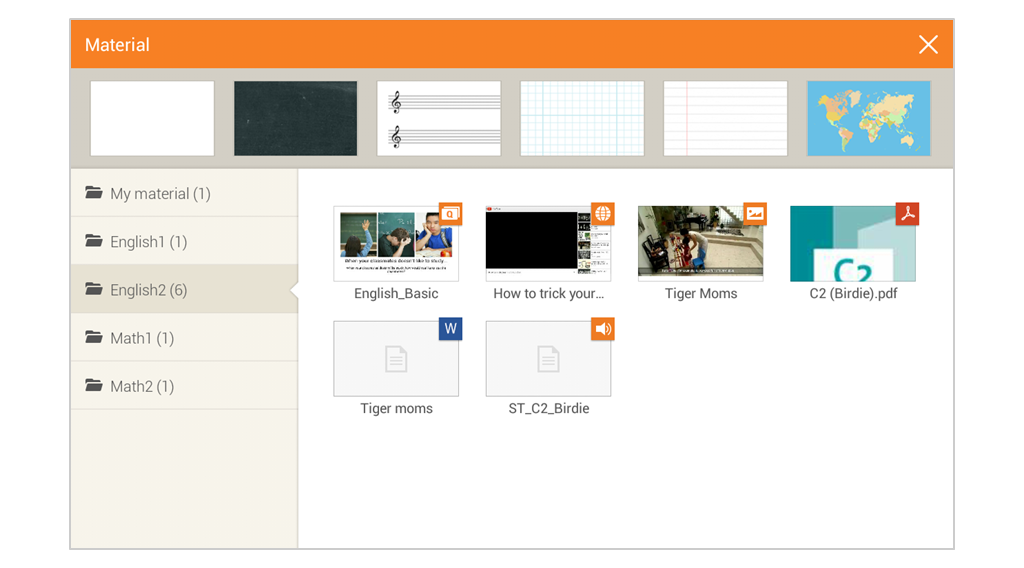
Select the class content
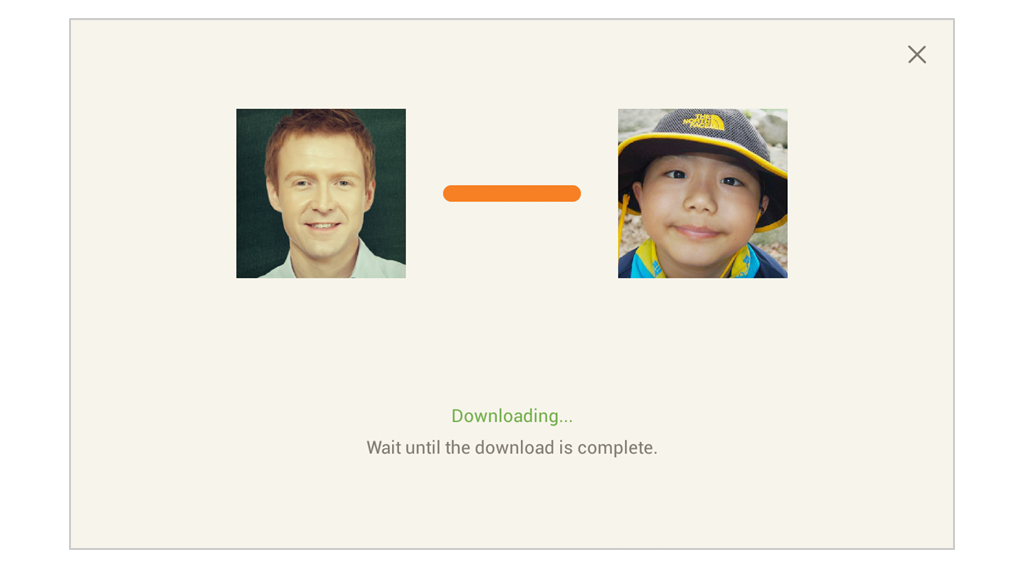
Sending content
Note: when the class begins, the teacher tablet and student tablets are automatically synchronized; the teacher and students are connected to the same page.
Not-assigned students joining a class
Students that have not been assigned to the class are able to join the class. They will need to connect to the same wifi network as the teacher and create a student profile. On the attendance page, a “?” will appear next to the student’s profile picture. To decline the student before class begins, select the student’s profile picture. A pop-up appears and the teacher can deny the student. If the teacher selects the start session button, all students shown on the attendance page will join the class.
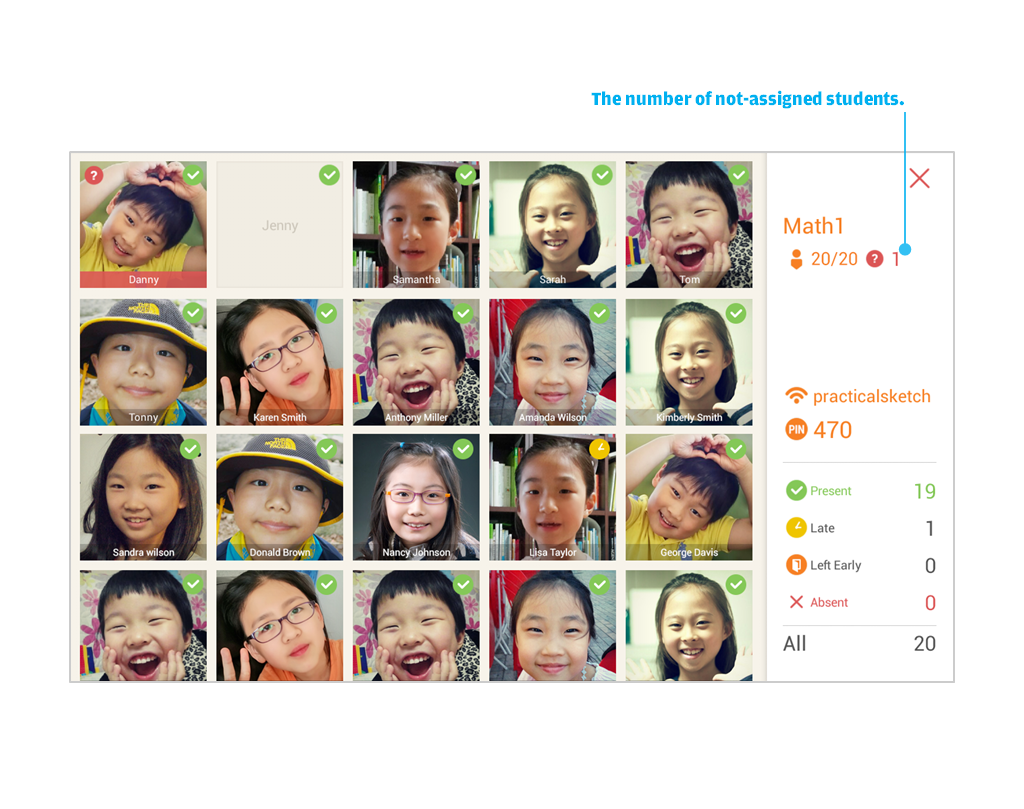
Confirm student attendance